6 easy ways to add personality to your getaway without breaking the bank.
Story By Linda Kast Styling By Lisa Bergman

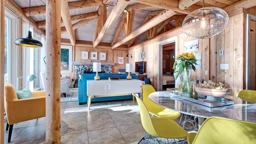
Nothing says, “Welcome back to the cabin,” like opening the door to a well-placed assortment of books, movies, colorful jars of no-wilt daisies, and a cozy place to rest your feet. Time spent at the cabin is all about comfort, and about surrounding yourself with the things you love. So, if you need inspiration on how to get beyond moose-and-bear motifs, or if you need ways to spruce up a dated burgundy and hunter green color palette, then keep reading. We’ll show you how easy it is to customize your space with little more than some paint, fabric, ready-to-upcycle furniture and the always-versatile hot glue gun.
Burlap daisies
Whether it's growing season outside or not, flowers shine in the spotlight and bring fun and lightheartedness inside. These burlap bouquets are good for more than one season, and their bright color can come from your personal stash of buttons or those you buy at the local five-and-dime store.
What you need:
- 1 yard of natural burlap
- Scissors
- Hot glue gun
- Glue sticks
- 18-gauge floral wire
- Assorted buttons (in various sizes and colors)
- Green floral tape or colored washi tape
Cut five-petal daisy shapes out of burlap in several different diameters: 3-inch, 4-inch and 5-inch. Leaving a 1-inch-diameter circle at the center of the daisy, add a dab of glue to the base of each petal and pinch these glued areas together. (Try layering the different sizes of daisy shapes to make different size flowers before pinching with glue.) Hold the petal bases in place until they are stuck together. I found using a utensil such as a screwdriver to hold the glued fabric in place prevented my fingers from getting burnt. Once all five petals are glued, run a
floral wire with a colorful stack of buttons attached at one end through the middle of the flower. Use floral tape or washi tape to wrap the base of the flower and the wire stem. Glue the base of a small square of floral foam to the inside of a painted canning jar. Insert the flowers into the floral foam.
 Canning jar containers
A blast from the past, canning jars once filled every farm home and cabin cupboard with the colorful allure of summer’s bounty within them, and maybe they still do. Put extra jars to use by giving them a coat of color for a multitude of decorative options.
What you need:
- Pint- or quart-size canning jars
- Milk paint, food coloring and Mod Podge (glue), or translucent spray paint
- Wax paper
Paint the insides of old canning jars with milk paint for a glossy, opaque look. To get a more see-through effect, mix white glue with several drops of food coloring inside each jar and swirl it around to coat the entire surface. Turn the jars upside down when finished and drip dry on a sheet of wax paper. Or try spraying the outside of the jars with translucent spray paint. No matter which method you choose, you’ve got year-round storage vessels that you can change on a whim. Use them to hold homemade flowers (like the burlap daisies mentioned here), paintbrushes, long-handled plastic or wooden utensils, and more. But because you’ve used paint inside or out, do not use the jars for storing anything edible.
Twig coat rack
I know we're all supposed to relax at the cabin, but many of us still like to keep things tidy. Get everyone in the habit of hanging up their coats and hats with this wall-mounted coat rack using V-shaped twigs as hooks. It’s also a great way to bring the outdoors in!

What you need:
- 2x2 slats of scrap wood or new lumber
- Nails
- 4 or 5 12–18-inch branches with sturdy twigs coming out
- Picture hangers
Build a 14x26-inch frame using scrap wood or new lumber. Measure the top-to-bottom dimension of the frame and cut the branches to the same length. Secure the branches to the inside of the frame by nailing through the outside of the frame and into the center of each branch with 3-inch nails. Be sure to plan your spacing before you start nailing. Attach the appropriate picture frame hanger to the back of the frame. You may need two hangers, one on each side, for the best stability. Hang where the indoor/outdoor traffic seems to be greatest.
 Stack-and-store units
RECYCLE, REUSE, RESTYLE. We can all get on board with upcycling something that’s got a bit of history, especially if it will corral movies, books and magazines in one handy spot. Maybe it’s a few wire baskets, or maybe it’s a collection of old produce crates. Whatever it is, make it part of the solution.
What you need:
- Old wire containers, gym locker baskets or wooden crates
- Burlap and/or other colorful ribbon
- 1?2-inch plywood cut into 51?2x3-inch rectangles
- Painter’s tape
- Chalkboard paint
- Small sponge
- Chalk
- Drill with a 1?16-inch bit
- 24-gauge floral wire
- Wire cutters
Because my baskets were made of chicken wire, I wove the burlap and the colored ribbon through the mesh at the front of the opening. If you have another type of storage container, find the best way to wrap and adhere the ribbon so it’s visible but not in the way of what you want to store. To make the wooden signs, cover a 1?2-inch border around all edges on the top side of the plywood rectangles with painter’s tape. Then, apply two coats of chalkboard paint with a sponge, one horizontally and one vertically, to the exposed wood (wait an hour between coats). When dry, remove tape. Drill two small holes 21?2 inches apart on one long side of the sign. Wrap a 20-inch piece of florist wire around a pencil or thin dowel rod leaving about an inch straight at both ends. Insert the straight wire ends into the holes in the wood. Curl the end around a pencil so the wire won’t pull out. Use a small piece of wire to secure the signs to the wire basket.

Refreshed footstool
Get your kicks with a dose of color. Paint can liven up even the dreariest of dressers, chests, side tables and ottomans. This old footstool got a redo with paint and a new colorful covering.
What you need:
- Old wooden footstool
- Window cleaner
- Fine grit sandpaper
- Tack cloth
- 2 tones of milk or chalk paint to match fabric
- 1 yard of fabric – heavy-duty upholstery works best
- Jute braiding
Clean the wooden legs and stringers of an old footstool with window cleaner to remove grease. Lightly sand all exposed wood with fine grit sandpaper. Wipe with a tack cloth to remove any dust. Paint with a dark base coat. Let dry and then sand to remove any paint flakes. Paint again with a lighter color paint. Sand lightly to expose the darker paint to give the finished piece a vintage look. Using brightly colored fabric, it’s pretty easy to make a replaceable stool cover. Start with a piece of fabric that measures the length and width of the top of the stool, adding at least 31?2 inches to all four sides (more if you want a deeper overhang). I sewed three rows of braided jute parallel to each side, starting about 11/4 inches from the raw edges of the fabric. Then, I mitered all four corners of the fabric and hemmed all four sides. The finished piece slides right over the top of the footstool.
 On the wall
Besides paint, one of the most inexpensive ways to add a pop of color to your cabin décor is to go fabric shopping. Fabrics run the gamut from serene to sensational. Look beyond the typical fabric stores, too. Many antique stores sell old linens, tablecloths and more. Be choosy, and find a print that works with your color scheme or style.
What you need:
- Stretcher frame
- 1 yard of fabric – duck, canvas or sturdy cotton work best
- Staples
- Staple gun
- Picture frame hanger (optional)
Buy enough fabric to cover the frame, adding 4–6 inches to both length and width. Turn the fabric wrong side up. Place the frame centered on top of the fabric. Starting on the longest sides, wrap the fabric around the outer edge of the frame and staple it to the center of the frame, first on one side, then on the opposite side, pulling it taut. Work your way along the sides to the corners, alternating staples from side to side. A few inches before reaching the corners, repeat the process on the shorter sides of the frame. When you reach the corners, fold the fabric by mitering the corner in one direction and then staple it to hold. Repeat on all four corners, keeping the direction of the miters consistent. Trim the fabric as needed. Set on the mantel or add a picture frame holder to the back of the frame and place on a wall.