One of the easiest ways to naturally warm up your cabin’s interior is to install tongue-and-groove (T&G) woodwork. Available in a variety of wood types, T&G boards can be installed on walls, on ceilings, in saunas, or as wainscoting or an accent in a bar or entertainment area.
The best part? Since the boards can be placed over existing sheetrock, post-construction installation is as simple as during new construction. So you’re spared some of the re-work or work-around headaches associated with typical remodeling projects.
Installing T&G is really no more difficult than stacking Legos. However, a few tricks of the trade will help make your installation even easier.
Prep Work
Note: For some installations, it’s preferable to stain or clear coat yourboards prior to installation.
1 Remove any floor or crown molding and other trim.
2 If the surface is already finished and you have electrical fixtures installed, remove the cover plates and install ¾-inch extensions on the boxes so the outlets or lights will be flush with the new wall.
3 Install sheetrock, as needed. (Even if you’re working with new construction, a sheetrock backing is required in most states prior to T&G installation on external and some internal walls for fireproofing reasons).
4 Mark your studs using a stud finder and a 4- or 6-foot level.
5 Once the wall is ready for boards, lay a couple of T&G boards flat on the floor, butting them up against the base of the wall. (These are your gap boards and should stay in place until you’ve finished the wall. The gap boards will prevent the boards from sliding down during the tapping needed to fit the boards together snugly.)
6 Rest the first/bottom row on top of the gap boards to create a ¾-inch gap between the boards and the floor. This gap reduces the potential for decay or staining from floor-induced moisture.
Install the Initial Run
For this article, we’ll assume a horizontal application. But you can also run the boards vertically or diagonally applying the same basic principles. A vertical application is fairly easy, as it usually eliminates the need for beveled butt joints between boards. Diagonal runs can create a nice touch, but installation is more difficult than vertical or horizontal applications. Most ceiling applications are similar to horizontal wall applications.
1 Most T&G boards have a smooth side and rough, more rustic, side. Choose a side and stick with it throughout your project.
2 Place your first board on top of the gap boards, with the grooved end facing down and tongue facing up. (Note: Don’t adjust the first row to level if your floor is uneven; doing so will make your baseboard and first row of T&G boards non-parallel. You can adjust the upper rows to level later, if needed.)
3 Now, using a power trim-nailer, nail the bottom of the base T&G board to the bottom plate. (Note: You can use a hammer and trim nails if you want, but expect to smash a few boards – and fingers – along the way.)
4 Then move up a few inches and nail the tongue to the studs, driving the nails down at a 45-degree angle. (With sheetrock backing, you’ll need a 2-inch nail to reach the studs.)
The only time you nail a T&G board anywhere other than the tongue is the bottom and sometimes the top row; all the other boards are secured with tongue nails only.
How to Handle Joints
Unless you have a wall less than 8- to 10-feet long, you’re probably going to have to make a joint on each row. There are a couple of different methods for creating a professional joint when joining T&G boards, but the simplest involves using the same miter saw you’re likely already using.
1 Assuming you’re working left to right, place the board flat on the miter saw, with the back (i.e., the side you don’t want to show) side down.
2 Cut through the face at 45 degrees, and then nail it into place with the pointed end on the far right.
3 The adjoining board will need two 45-degree cuts to butt up against the open angle (See photos at left).
The result? A neatly mitered cut that will not show gaps as the wood shrinks during its natural drying process.
6 Tips for Working Your Way Up the Wall
Once you install that first row and master making the miter cuts, simply work your way up the wall by following these six tips:
? As you install boards, occasionally stop to measure the distance from the top row to the ceiling.
? If one side is lower than the other, you can cheat it upward by not tapping the tongue and groove all the way together over the course of a few rows. (It may be necessary to nail closer to the top of the tongue to hide the nailheads on these cheater rows.)
? It’s not essential to land every joint on a stud; you can float your joints between studs. Ditto for any depressions in the stud wall; instead of forcing the board to fit these concave spots, simply skip the out-of-alignment stud to give yourself a straighter wall.
? If you have trouble getting the tongue and the groove to fit together snugly, use a short chunk of waste T&G board over the top board, then tap into place with a hammer. Hitting the top of the to-be-installed board with a hammer will usually smash the tongue, making installation on the next row even more difficult. Rubber mallets don’t work very well, as they tend to leave rubber smudge marks on the boards.
? Keep the top row of boards in mind as you advance up the wall. You want the top row to be a full or nearly full-width board.
? If you’re not installing trim or crown molding to hide the top of the board, you’ll need to trim the tongue off with a table or circular saw.
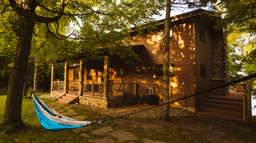
Getting back into nature is one of the great benefits of owning a cabin. Properly installed wood is a natural element and can go a long way toward enhancing that rustic ambiance.
Kurt Anderson has installed a lot of T&G over the years and has subsequently become an expert at hiding his mistakes with a combination of the tips in this article … and a few strategically placed pictures.
Unless you have a wall less than 8- to 10-feet long, you’re probably going to have to make a joint on each row. There are a couple of different methods for creating a professional joint when joining T&G boards, but the simplest involves using the same miter saw you’re likely already using.
1 Assuming you’re working left to right, place the board flat on the miter saw, with the back (i.e., the side you don’t want to show) side down.
2 Cut through the face at 45 degrees, and then nail it into place with the pointed end on the far right.
3 The adjoining board will need two 45-degree cuts to butt up against the open angle (See photos at left).
The result? A neatly mitered cut that will not show gaps as the wood shrinks during its natural drying process.
6 Tips for Working Your Way Up the Wall
Once you install that first row and master making the miter cuts, simply work your way up the wall by following these six tips:
? As you install boards, occasionally stop to measure the distance from the top row to the ceiling.
? If one side is lower than the other, you can cheat it upward by not tapping the tongue and groove all the way together over the course of a few rows. (It may be necessary to nail closer to the top of the tongue to hide the nailheads on these cheater rows.)
? It’s not essential to land every joint on a stud; you can float your joints between studs. Ditto for any depressions in the stud wall; instead of forcing the board to fit these concave spots, simply skip the out-of-alignment stud to give yourself a straighter wall.
? If you have trouble getting the tongue and the groove to fit together snugly, use a short chunk of waste T&G board over the top board, then tap into place with a hammer. Hitting the top of the to-be-installed board with a hammer will usually smash the tongue, making installation on the next row even more difficult. Rubber mallets don’t work very well, as they tend to leave rubber smudge marks on the boards.
? Keep the top row of boards in mind as you advance up the wall. You want the top row to be a full or nearly full-width board.
? If you’re not installing trim or crown molding to hide the top of the board, you’ll need to trim the tongue off with a table or circular saw.
Getting back into nature is one of the great benefits of owning a cabin. Properly installed wood is a natural element and can go a long way toward enhancing that rustic ambiance.
Kurt Anderson has installed a lot of T&G over the years and has subsequently become an expert at hiding his mistakes with a combination of the tips in this article … and a few strategically placed pictures.
How to Make Professional Joints
Take a look at the ends of the boards: Properly beveled butt-joints bring out the best appearance for tongue-and-groove woodwork.
Take a look at the ends of the boards: Properly beveled butt-joints bring out the best appearance for tongue-and-groove woodwork.
While some people use a router to make the beveled joint, it’s much easier to create one using the “three-cut” approach with a compound miter saw.
Set the compound-miter at a 45-degree angle, then cut the first board all the way through. Cut the next board all the way through as well, then turn it around and “nip” the leading edge off flush with the factory bevel.
Stagger your joints for the best appearance, and use 2-inch nails or longer to reach through the sheetrock to the underlaying studs.
Choose the Right Wood
Generally speaking, harder woods are more difficult to work with, but offer better resistance to impacts in high-use areas. Harder woods also tend to have more pronounced patterning due to their dense nature and are often darker than their softer cousins. Subsequently, these harder woods make excellent wall or ceiling choices in rooms with plenty of natural light.
With the exception of red cedar, most of the softer woods are lighter in appearance and will lighten a dark room. Cedar is a popular choice because of its wonderful natural aroma and resistance to rot. However, unless you’re building a sauna or lining a closet, don’t expect that initial cedar smell to last. After a few months, the aroma is only noticeable in high-humidity situations or tight, closed-off areas.
A great way to determine the right wood type and pattern is to visit a specialty T&G lumber supplier, which often has displays set up for prospective buyers. Many times you can get a great deal by choosing #2-grade paneling. These supposedly lower-quality boards usually have more knots and color, resulting in a more natural or rustic look that many people actually prefer.
*for #1, or select grade. #2 grades typically have more heartwood and knots.


 The Woodworkers Shoppe
  The Woodworkers Shoppe
  The Woodworkers Shoppe