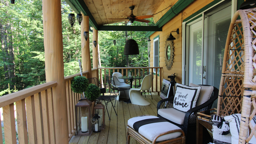
If there was ever a symbol for relaxation, a low-slung
Adirondack chair overlooking the lake has to be the iconic image. Yet sometimes a more social arrangement is called for, and plopping down in a tête-à-tête allows you to accomplish a cabin trifecta: comfort, good company and a snacking platform. So, what it’ll be: Adirondack chair or tête-à-tête? Solitude or companionship?
Well, why not have it all?
In this article, we’ll walk through the construction of a composite tête-à-tête, one that can convert to two stand-alone chairs in less than a minute. This not only provides flexible seating options but also allows you to build the tête-à-tête in the comfort of your garage and then easily transport it to the cabin.
The chair shown in the article was constructed based on a great, simple design by Lowes (www.lowes.com). But we've enhanced some of the structural components – a must when chairs need to support heavier guests and withstand the rigors of an outdoor lifestyle. Feel free to experiment with different plans, as this article will concentrate on the oft-neglected tips and techniques of chair construction that will allow you to complete almost any chair or tête-à-tête in a weekend … either alone, or with the help of a friend.
Create the Chair Base
Constructing a solid chair base with the correct curves is by far the most critical and time-consuming portion of the project. The two slanted, curved chair legs need to be mirror images, and the cuts must be angled just right to create the reclined seating required for proper cabin lounging. But don’t worry – there are no high-brow methods involved, just common sense approaches with the right tools.
For our main legs, we eschewed the 1x6-inch boards recommended in Lowe’s online plans and opted for 2x6-inch red cedar instead.
Cut the 2x6 board to a 36-inch length, then butt the board against your miter-saw fence. Set the miter saw angle at 25 degrees, mark the end 2 7/16 inches, and nip off the corner – it’s that easy. For a more elegant look, the remainder of the end is rounded off. Forget the grid paper or compass and break out a coffee can, a perfect circular pattern. Trace the edge, cut it out with a jigsaw (fitted with a quality blade), and one half of the main leg is done (Photo 1).
The front end of this board also requires specialty cuts, which will form the rounded front and comfortable curved seat base that characterizes Adirondack chairs. For the front rounded cut, we use the same “bucket technique” as in the previous step, with a 5-gallon bucket instead of a coffee can (Photo 2).
To prevent splintering or cracking (a very real problem when working with cedar) be sure to pre-drill pilot holes before screwing the front legs into place. While the plans called for the vertical legs to be connected at exact locations – 9 3/16 inches up on the interior corner and 26 3/16 inches in – actual connection points needed to be slightly modified to provide a level and square base (Photo 7). Line the supports up and double-check them to ensure they match (Photo 8), and then cut and secure the cross braces. The rear brace is located ¾ inch back from the bottom end of the long butt curve.
The Tête-à-Tête Conversion
Adding a shared table to these two chairs is the easiest part of the project. We used a 22.5-degree angle for the tête-à-tête configuration, simply building an angled table that fits under the arm rests of the Adirondack chairs (Photo 13).
The edge supports of the table are 1x4-inch boards, run flat against the 1x6-inch table surface boards. A 1x4 board is then run down the center, with end caps on the short and long ends of the angled table. Four 2-inch screws are used to secure the table to the underside of the Adirondack chair armrests.
For extra support, we ripped a 1x2-inch piece of cedar for a rear center leg. It’s attached with a threaded bolt to the center table support, allowing the table to fold flat when the tête-à-tête is dissembled into two Adirondack chairs.
And there we are: a complete tête-à-tête, at less than half the cost of a purchased unit.
Need a little alone time? Just unscrew the four connecting screws, fold the leg in, grab a chair and head for the beach.
Kurt Anderson enjoys practicing his brand of ‘bucket technique’ carpentry almost as much as he enjoys relaxing in his homemade tête-à-tête at the family cabin.
Now comes the last, and only truly technical cut of the bunch – the long, low-angled curve where your butt will soon be parked. Fourteen inches long and only ¾-inch deep, this cut requires another guide for best results. While a thin metal or fiberglass rod can be used to create a uniform curve, we ripped a long, thin piece of wood to use as a flexible pattern (Photo 3), then notched out the inside section to create two tabs for clamping bases. This template only takes a few minutes to make, and when you’re done all you have to do is clamp it along the top of the board and mark your cut (Photo 4).
Now that your cuts are completed, use a palm or belt sander to smooth out any irregularities. The edges of each cut should also be sanded down to eliminate splinters and give the base a more professional appearance; using a router or hand-plane to round the edges is also a good idea. Once it’s smooth and clean, simply use the entire board to mark and cut your other runner (Photo 5). Mark any discrepancies between the original and its twin (Photo 6) and sand until the two runners are mirror images. Use the original runner as the template for the second chair as well; as Michael Keaton’s character discovered in the movie Multiplicity, making a copy of a copy can create some quality-control issues.
Build the Backrest & Arms
The backrest is fairly simple to construct. For this chair, with its somewhat heavier appearance, we used four 6-inch boards instead of five 4-inch boards for purely aesthetic reasons (aesthetics is always the reason you give people when you pick up the wrong boards from the lumber-yard). The bottom and top brace boards are straight cuts; the middle board also acts as an arm-rest support and is cut at a 25-degree angle on a table saw. To provide an un-marred surface, attach the braces to the backrest boards with 1 ¼-inch screws from the back (through the brace boards and into the vertical backrest boards). Once assembled, use a screw in the center gap of the backrest as a pivot, and then mark out the half-circle on the top edge of the board
The backrest is fairly simple to construct. For this chair, with its somewhat heavier appearance, we used four 6-inch boards instead of five 4-inch boards for purely aesthetic reasons (aesthetics is always the reason you give people when you pick up the wrong boards from the lumber-yard). The bottom and top brace boards are straight cuts; the middle board also acts as an arm-rest support and is cut at a 25-degree angle on a table saw. To provide an un-marred surface, attach the braces to the backrest boards with 1 ¼-inch screws from the back (through the brace boards and into the vertical backrest boards). Once assembled, use a screw in the center gap of the backrest as a pivot, and then mark out the half-circle on the top edge of the board
Now, rest the backrest on the chair base and use a level to ensure the middle-board armrest is at the proper height (Photo 10). Cut out the armrests by using the same technique as before; make one good arm, and then use it as a pattern for the three remaining armrests. Make sure you flip the template board over so the smooth side of the cedar board is facing up on both chairs.
While you can screw the armrest straight down into the brace and leg, we continued the approach of hiding fasteners whenever possible to give a smooth, clean exterior surface. However, since the front arms are the Achilles heel of Adirondack chairs – they take the brunt of the sitter’s weight when he/she exits and enters the chair – we doubled up our support by using both cedar and brass brackets under the arm (Photo 11). The back of the armrest (i.e., behind your elbow when sitting) was screwed into the backrest horizontally, with the screw-access hole plugged with a cedar dowel.
While you can screw the armrest straight down into the brace and leg, we continued the approach of hiding fasteners whenever possible to give a smooth, clean exterior surface. However, since the front arms are the Achilles heel of Adirondack chairs – they take the brunt of the sitter’s weight when he/she exits and enters the chair – we doubled up our support by using both cedar and brass brackets under the arm (Photo 11). The back of the armrest (i.e., behind your elbow when sitting) was screwed into the backrest horizontally, with the screw-access hole plugged with a cedar dowel.
The frame is now complete, with only the seat slats remaining. Once again, we went with a heftier design, ripping a cedar 2x4 into three equal widths to give an extra ½ inch of girth over more typical ¾-inch-thick boards often used as slats. Space your slats for uniform gaps – we used a simple carpenter’s pencil – then secure using 2 ½-inch screws (Photo 12).
The two chairs are now structurally complete. Sand the entire project, and then stain, paint or use a clear sealant. To enhance the natural beauty of the red cedar, we opted for Thompson’s WaterSeal, an application that will need to be repeated every six months for the first couple years and annually thereafter.
The two chairs are now structurally complete. Sand the entire project, and then stain, paint or use a clear sealant. To enhance the natural beauty of the red cedar, we opted for Thompson’s WaterSeal, an application that will need to be repeated every six months for the first couple years and annually thereafter.
 Shawn Thompson