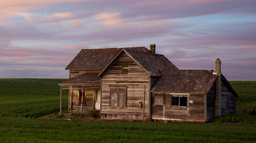
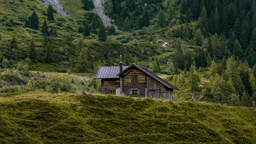
By definition, a stain is something that leaves a lasting mark on a surface. Unfortunately, when it comes to the stain on the exterior of your cabin, fading and peeling can occur within just a few short years. Since staining exterior siding is a time-consuming and expensive procedure, it makes sense to get the most of each application. Follow the tips below to extend the life of your stain and protect your cabin’s exterior for years to come.
Choose the Right Stain
There are two major attributes to exterior stains when it comes to longevity: transparency and color. Exterior stains come in three basic transparencies: solid, semi-transparent, and clear. Think of these groups as different grades of sunblock, with solid stains offering up a zinc-oxide, lifeguard-style protection.
Applying a semi-transparent stain creates a nice buffer to UV rays, while also displaying some of the wood grain of your siding.
Clear, or transparent stains, can create a beautiful effect on grained siding, but that beauty can be short-lived in the rugged outdoors and can result in faded siding within a year or two.
The key to choosing the best type of transparency comes down to climate, the existing appearance of your siding and personal preference. For siding that is exposed to strong sunlight, or that might already have deep discoloration, a solid stain will provide maximum protection while covering up any pre-existing blemishes. A semi-transparent stain strikes a nice compromise between protection and preserving the natural beauty of the wood siding. Clear stains are best saved for inside work.
Some stains, like Sashco’s Trans formation, form a film that also helps improve the durability of the stain.
Color can also play a role in the longevity of your stain, according to Ashley Paulson from Sherwin-Williams. “Stains with yellow, orange or red pigments are more susceptible to UV-damage,” says Paulson. “These pigments tend to absorb more ultraviolet light, with fading occurring more rapidly than it would for brown or gray stains.”
Both oil- and water-based stains offer fairly similar protection in the long-term, but oil-based stains tend to fade out a little quicker.
For wet climates – including lakeside cabins – mold can also prematurely damage the appearance of your stain, as well as the siding it’s protecting. For siding exposed to high moisture, consider using a stain that has synthetic instead of natural, or organic, resins. Mold will feed on organic resins, and reducing this food source helps keep mold at bay.
Whatever stain you choose, be sure to test it on a small section before applying it full-scale. And buy your stain in bulk (i.e., 5-gallon buckets) to reduce any color discrepancies between different batches. If you purchase 1-gallon containers, check the lot numbers; if the numbers don’t match, blend the different batches together for a uniform stain.
Preparation
Whether this is the first or 10th coat of stain for your siding, it’s imperative that you correctly prep the wood surface before re-staining. Stain adheres to the siding through penetration, and any dust, debris, or mill glaze (residue from the lumber mill) reduces this penetration. In fact, improper prep work is one of the major causes of premature stain failure.
One of the best ways to clean your siding is with a pressure washer. However, it’s important to have the proper pressure settings, as a high-powered stream of water can easily scar pine or cedar siding. Adjust the nozzle to provide a spray, versus a jet, of water, and then test on a sample piece of siding in a back corner of the cabin. There are also products, like Blairstown Mill Glaze-Away, that will open the pores of new wood siding.
If scarring seems likely, or you don’t have access to a pressure washer, use a bristle brush and a mild detergent instead (ratio: 1/3 cup per gallon of water). Dark staining from mold can be cleaned using a 3:1 water to bleach solution. As always, be careful to avoid mixing ammonia-based cleaning agents and bleach. Such mixing can create poisonous chlorine gas.
For gray, weathered siding, use an oxalic acid cleaner to remove the faded look. Use a non-loading sandpaper to remove stubborn deposits or to scuff-up shiny, sun-baked surfaces that tend to repel stain.
Once the cleaning is complete, allow the siding to dry out over the course of several low-humidity days. Any water from the cleaning process that is retained in the wood will eventually work its way out during warm, dry weather, pushing the stain out with it. An easy way to test the moisture content is to sprinkle a few drops of water on the siding; the faster it’s absorbed into the wood, the dryer the siding.
Application
When it comes time to apply stain to that beautifully prepped wood, options abound. While you can use a sprayer or roller to quickly apply large quantities of stain, it’s tough to beat an old-fashioned brush application for longevity. Brushes tend to apply the maximum amount of stain to the wood surface, increasing penetration and making the stain adhere to the wood. Use a natural bristle brush for oil-based stains, and water-resistant synthetic bristle brushes for latex stains. Two coats are much better than one, so for maximum protection apply a second layer after the first layer dries.
From a logistical standpoint, there are two important things to remember when physically applying stain; stick with your rows, and stay in the shade. Applying stain across three to five rows of siding across the entire width of the exterior wall eliminates unsightly lap marks, and working from the top down allows you to brush above the ladder. It’s also easier to spot any drips or runs that work down into the unstained sections of the siding. Simply brush these dribbles into the wood, and then cover them up when you get to that row.
Short, intense drying periods make the stain boil on the surface of the wood, breaking down those important pigments before they can even begin to protect the siding. Working in the shade, always a smart thing to do, also allows the stain to dry out in a measured fashion.
Avoid staining in cold or hot temperatures (follow the manufacturer’s recommendation for the proper temperature during application) or high-humidity conditions.
Remember that stains separate quickly, so keeping the stain properly mixed is imperative for the best appearance and protection. It’s easy to forget this simple task while staining, so consider placing an old alarm clock next to the stain bucket. Every time you have to hit the snooze button (every 5 to 10 minutes or so), give the bucket a few swirls.
Maintenance
Long-term exposure to sunlight is the major enemy of any stain, and there is little you can do to prevent UV rays from reaching the siding. However, applying a clear wood sealant over the top of the stain can help protect against moisture-induced blemishes and eke out a little more time between staining.
Also, protect your siding from moisture by periodically checking it for contact with shrubs, dribbles from sprinklers or outside faucets, and any other sources of dampness.
Two coats of properly applied stain on prepped siding is going to last anywhere from five to eight years on average. By choosing the right stain and applying it correctly, your staining will creep up into the upper realm of that five-to-eight-year life expectancy, giving you a few more summers of leisure between stainings.
In Tom Sawyer-like fashion, Kurt Anderson is actively recruiting volunteers to stain his house and family cabin.
 dreamstime.com


