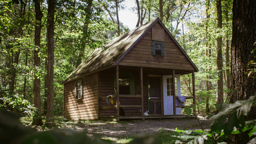
I was looking for a great story about gardening for this issue. Something that my fellow cabin lovers could tackle in a sunny afternoon, and something that would make gardening at the cabin just a little easier. That’s when my boss walked into my office with an idea. I should have known right then and there ...
“Hey, Andy I’ve got an idea – self-watering planters!” she said. “They’re easy, inexpensive, perfect for the cabin, and you can make them in an afternoon. Why don’t you come out to the cabin this weekend, have a beer, and I’ll show you how to do it.”
It sounded like the perfect plan. A little too perfect, maybe. What I didn’t realize was that my boss, like any good gardener, had seized upon the opportunity to get an extra pair of hands and a strong back to help her out.
When I arrived at the cabin that weekend, any fantasies of lounging in the sun with a cold one were quickly wiped away by her wicked grin and what seemed to be 40,000 pounds or so of potting soil stacked neatly next to the garden.
Twenty minutes later, as I sat battling heat stroke and a sore back under a tree, she gave me the scoop on the planters.
“I’m a lazy gardener,” she said. I took a moment to ponder what an active gardener would look like, since we had just hauled what seemed like a metric ton of dirt, and then focused back on what she was saying. “I loved the planning, the planting and the produce, but I didn’t want to water everyday. I’d rather be out on the pontoon. So, it was kind of survival of the fittest in my garden. I’d give the plants a great start, water them a few times ... and then they’d die because I wasn’t always at the cabin.
“But I didn’t want to miss out on those delicious veggies, so I decided to build my own solution to the problem. These self-watering planters work really well. I generally water once a week when it’s really hot and dry, and the plants thrive.
“Plus, with these planters, it’s like having my very own mini-fridge on the deck. I can kick back in my chair, read a book and pluck cherry tomatoes right off the vine.”
And you know what? Helping her assemble those planters that weekend inspired me to make some of my own. Once the crick in my back goes away, that is.
Material List
Here’s what you’ll need:
? A pot with enough space for a water reservoir that will keep the plant hydrated for as long as you’re away. This one (at right) holds about five gallons of water.
? Three pieces of perforated drain tile cut into equal lengths. They should be as tall as you want your water reservoir to be deep.
? Wicks: Three clean socks or strips of fabric that are as long as the pot is high.
? A circular piece of sturdy plastic to sit on top of the drain tile and serve as your dirt platform. (The lid from a plastic pickle bucket works great.)
? A piece of 1-inch-wide flexible tubing as long as your pot is tall. This is your watering spout, the way you’ll fill the reservoir.
Step-by-step Instructions
1. Prep the Planter
Set the pieces of drain tile into the bottom of the pot (photo A). Drill a small hole through the side of the pot just above the drain tile (photo B). This will serve as your overflow spout and let you know when the reservoir is full.
Tape the fabric wicks to the lip of the pot, dropping the other ends into the pot until they just touch the bottom. These wicks will allow every drop of water to be pulled from the reservoir and into the dirt.
2. Create the Dirt Platform
Cut the piece of plastic so it fits snugly into the pot, resting on the drain tile with very little gap around it. Once the plastic has been cut to size, perforate it with a large drill bit, putting lots of holes in it to allow the dirt to aerate and for the roots to grow through and water to percolate (photo C). Cut a small hole in the plastic platform the size of the flexible tubing.
Lay the dirt platform on top of the drain tile, and stick the tubing down through the platform hole (photo D).
3. Fill 'Er Up
Now it’s time to add the dirt. But you’ll want to do this in two stages. Lay half the dirt on the platform, and then remove the tape from the socks and lay them on top of the dirt (photo E). Now you’re ready to add the rest of the dirt. This ensures that the water will wick up into the heart of the dirt, keeping everything well-watered.
4. Plant Your Plants
All that’s left to do now is transfer your plant into the pot, and fill up the reservoir with a hose, watching for water to trickle from the overflow spout, telling you that your self-watering pot is ready to do the work for you!
Andy Bennett has learned his lesson. When his boss suggests an article idea involving dirt, run away.
 Cabin Life Staff
  Cabin Life Staff


