

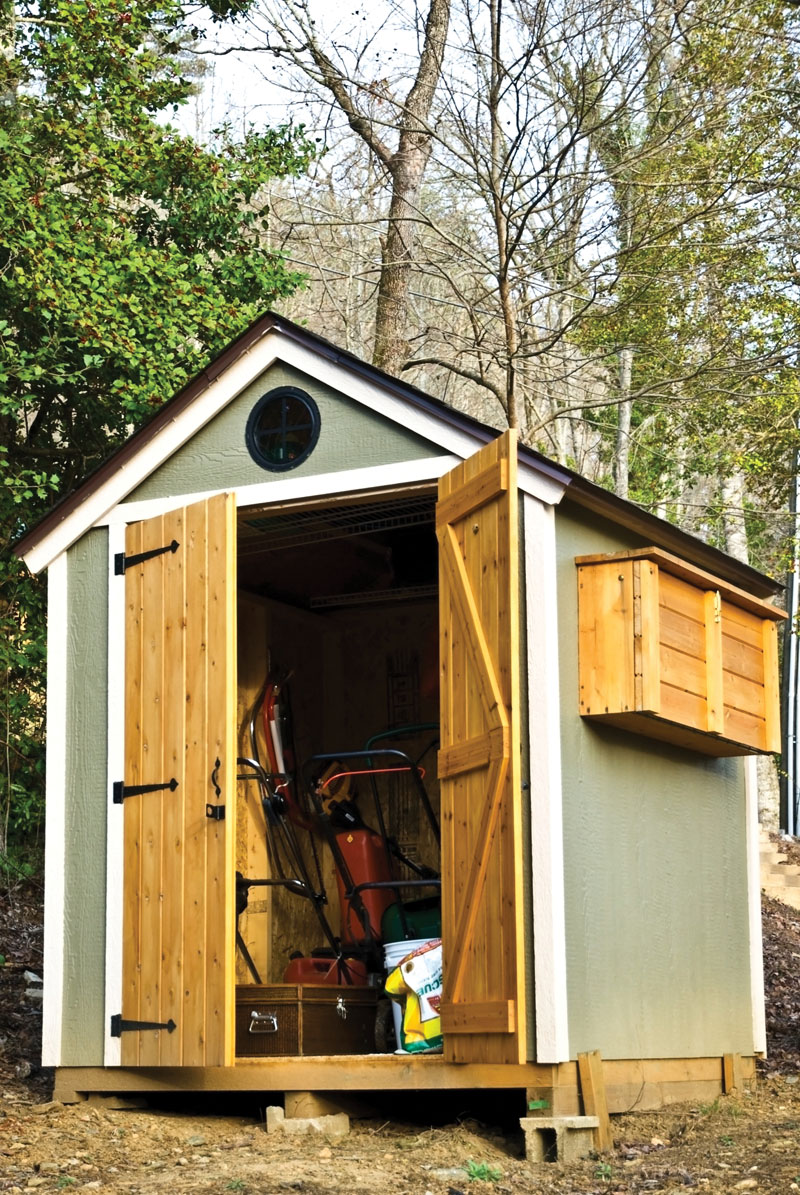
Time and space – there’s never enough of either at the cabin. Building a storage shed is a great way to increase storage space, but it’s a big job, involving significant investments of weekend time or hard-earned vacation days. Yet by learning a few simple basics, any DIYer with modest carpentry skills can build an eye-pleasing shed to store all those extra goodies at the cabin.
Yeah, I know: Pre-cut shed kits abound at home improvement stores and on the Internet, and it’s easy enough to find fully-assembled sheds that manufacturers will deliver right to your cabin yard. All that’s fine and dandy, but sometimes a pre-fabricated box building just doesn’t fit into its surroundings. An aesthetically pleasing cabin is a natural part of the landscape, and the outbuildings should reflect that rustic character. The best way to accomplish that is to “build-to-suit” – a contracting term that means you’ll end up with a building that looks like it belongs exactly where it is.
This article lays out some basic carpentry tips for framing up a storage area that you can modify to complement common cabin designs. This is not much different than the process used to build a garage or simple cabin, and is an excellent way to build your first structure yourself. The best part? When you’re done you’ll be able to finish the exterior of your shed to match your cabin’s design … and have a bunch of extra storage space to boot.
The Basics: Design, Site Location & Foundation
The size of your shed is obviously dependent on your needs. Still, a good rule to follow is the law of thirds: simply take your cabin dimensions and divide both length and width by three. So, if your cabin is 24x30 feet, a 8x10-foot shed will probably look like a natural extension of the original building plans, rather than an afterthought. Don’t follow this rule too closely, of course; nobody except the lumberyard wants you to build a 9x13-foot shed. Round up or down to the nearest round number, preferably in multiples of four (i.e., 8x12 feet). The height, by the way, should be a minimum of 8 feet.
The next step is to site the shed and choose the foundation. As long as you have good drainage, a simple green-treated wood base will last for decades. In areas with low soil moisture and minimal frost heaving, you can place a frame directly on an elevated sand or gravel base. Make sure you compact the base first to prevent the shed from settling, as even a ½ inch of sagging can make opening that shed door a nightmare down the road.
In areas with poor drainage or freezing conditions, it’s a good idea to dig cement footings down into the soil, with the tops of the footings extending above the grade (this type of base is a prerequisite if your shed is over 200 square feet). The pressure-treated floor joists will then rest on the footings. A 4-inch-thick cement slab with thickened edges is the ultimate base, but it’s also expensive and requires the most skill to prepare and finish.
Basic Carpentry
Okay, time to start acting like a carpenter and string those floor joists together. One quick reminder first: Be sure to subtract the width of your outside (or rim) joists from the length of your interior joists before you nail things together. If, for example, you’re building an 8x12-foot shed, your rim joists on the narrow end of the shed should be an even 8 feet. But the rim joists on the 12-foot “long end” wall, and all interior joists, should be 11 feet, 9 inches – or 12 feet minus the 1 ½-inch width for each of the “narrow end” rim joists. Use either 2x8-inch or 2x10-inch pressure-treated lumber for your joists, and secure with 16-penny nails or 3-inch exterior screws.
Cut the rim joists, nail or screw together, and check squareness with a framing square (Simply move a corner in or out to square the entire rim joist before adding interior joists). Now, mark your interior joists, either 16 or 24 inches apart. A 16-inch, on-center floor provides quite a bit more support for a minimal increase in cost, and that extra support is essential if you’re storing riding lawnmowers or other heavy equipment in the shed.
The easy way to mark your interior joists is to hook the tape measure on the outside of the rim joists, and then mark every 16 or 24 inches with a carpenter pencil. This is your “on-center” mark; make sure the joist is centered on your mark or the floor sheathing joints will float.
An old carpentry trick is to mark the boards ¾-inch shy of the mark, then butt the edge of the board to this mark. Use ¾-inch plywood for the flooring. If you’re working solo and ¾-inch plywood is too unwieldy, you can put in a double layer of ½-inch plywood for an even sturdier floor. Check for squareness one more time, then attach the sheeting with screws (nails tend to back out over time). Installing tongueand- groove plywood flooring will also improve the strength of your floor.
Up with the Walls
Since most sheds are cold storage structures and don’t need insulation, 2x4-inch exterior walls are more than sufficient. For a big shed you can buy studs pre-cut for building an 8-foot wall, which are 92 ½ inches, or 4 ½ inches short of 8 feet. This shorter length allows for the extra wall height you’ll add with a bottom plate and a double top plate. A double top plate is a requirement when building larger garages or houses, but since most sheds don’t exceed 16 feet in any direction, you can skip the double top plate for a single, unbroken top plate.
If you can run a single, unbroken top plate you’ll need to cut studs 93 inches long for a final 8-foot-tall shed wall. All except the bottom plate can be standard, or white wood. Use pressuretreated, or green wood, for the bottom plate.
Space your wall studs either 16 or 24 inches apart. Unlike the floor joists, spacing the wall studs 24 inches apart won’t cost you much in terms of structural integrity. Typically you’ll use 16-penny nails for nailing studs together and 8-penny nails for securing sheeting. An air nailer can be rented for a minimal charge, and is well worth the price of the half-dozen bruised and blackened fingernails that seem to come standard with big projects and handheld hammers.
Build your walls flat on the floor of the shed. Framing in the rough opening for doors and windows is the only hard part about this task, and it’s really not that difficult. You’ll need to add some extra studs for the door to build in a header, or horizontal support. This keeps the weight of the roof from collapsing what would be the weakest part of the shed – places where there aren’t any studs to support weight. Think of headers as a bridge between piers.
Adding a window is a great way to enhance visual appeal and add some lighting in bigger sheds. However, it does increase the cost and lower security for a building that isn’t under constant surveillance. Traditional sheds have Frenchstyle double doors; some people incorporate small garage doors into their shed’s design, typically on the gable end. Either should provide plenty of ambient light when open.
Once the walls are built, stand them on end and tack the bottom plate to the floor rim joists with some 16-penny nails, then secure firmly with lag screws. Nail the walls together at the corners, sheet with ½-inch OSB (oriented strand board) sheeting, and all that’s left is (gulp) the roof.
Building the Roof
To this point, all we’ve been building is a simple box. To truly match your cabin’s style, the most important structural detail is matching roof style and installing eaves.
Detailed instructions for installing rafters or trusses, building and framing in the eaves, and all the associated detail work could probably fill up a book. For the purposes of this article, it’s usually sufficient to call a truss manufacturer and tell them what style and pitch trusses you want, along with the dimensions of your shed. Then you have two options: Either buy the whole batch, or order a template for your regular and drop trusses and make the rest yourself. Drop trusses, by the way, are installed on each gable end and have 3 ½ inches less elevation than standard trusses, allowing you to build out your gable end eaves. There are a multitude of good resources out there for the DIY truss and eave builder – just take your time and be patient.
Once you’ve finished the shell of the building, it’s a simple matter of matching exterior siding and roofing materials to that of your cabin. Half-log siding, faux brick or stone – even shake shingles or metal roofing – can all be installed on this shed shell with no structural concerns, giving you a built-to-suit shed at a fraction of the cost of a contracted job.
The only really hard decision you have left is what you’re going to do with all that extra space in the cabin.
Kurt Anderson is a freelance writer who has built houses and garages, but the first structures he built were a tree fort and a shed. While the tree fort has joined the great scrap heap in the sky, the shed is still standing strong.
 Susan Leggett, dreamstime.com


