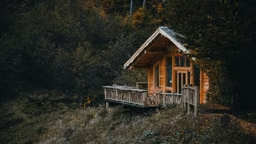
For do-it-yourselfers with a strong back (or lots of cold refreshments and friendly neighbors) building a retaining wall is a quick, cheap project that can transform an ordinary yard into a landscaper’s paradise in a day or two. For sloping or hilly lawns – common near lake or beachfront property – retaining walls also prevent erosion and channel runoff away from your cabin’s foundation.
Sounds like a no-brainer. All too often, though, retaining walls deteriorate as fast as last season’s lawn clippings. It’s easy to see why – Retaining walls are inherently lonely structures, often without so much as another wall to lean on. Factor in freezing mud, frost heaves and often haphazard construction, and many picturesque walls turn into a pile of rubble after a few short years.
Yet no matter how rough the conditions, retaining walls can be built to stand the test of time. These four tips will help you create a wall that will be around for generations to come.
#1 Level the Playing Field
No matter what kind of structure you build, the odds of it being around in 20 years increase exponentially when you have a level, solid foundation. This is especially true for stand-alone retaining walls.
Digging the foundation footings is easy; start at the lowest point of the wall and work your way uphill, terracing as needed. For best results, dig deeply enough to bury a 4-inch layer of crushed rock, lay landscape fabric on top of the rock, then add 2 inches of clean sand in which to set your blocks. This provides a sturdy, well-drained and level base.
Your base layer of block goes on top of the rock and sand base. Bury the first layer of block halfway down for three-course walls or less; completely bury it for four-course walls or higher. Excavate the footing trench to twice the width of the blocks, which leaves room for aggregate backfill on the rear side of the trench (see diagram).
The landscape fabric should run down the length of the trench before laying your sand cap. (Leaving the landscape fabric below the sand allows a few more weeds to sprout, but it makes setting and leveling the blocks much easier.) Extend the fabric up the side, leaving plenty of slack to prevent tears. This prevents mud from entering cracks in the wall, which can freeze and expand when temps drop. Compact each layer with a commercial tamper or a wooden post.
#2 Keep It Dry
Running water is one of the most subtly destructive forces on earth. When it comes to retaining walls – often built into an existing slope – water can be your worst enemy.
The best method to reduce water damage is to install drain tile directly behind the footings, capturing and diverting the water before it becomes a problem. Dig the drain tile down so its top is slightly below the bottom of the base course of block, then cover it with landscape fabric and crushed rock. The landscape fabric can go underneath the drain tile, as long as you put crushed rock (not sand) on top of the tube. The far end of the drain tile needs to be daylighted; i.e., run it so it drains to daylight.
Once that’s done, bring on the monsoon rains!
#3 Keep Everything Together
Once you’ve got a solid, dry base, the rest of the wall should go up quickly. For walls less than kneeheight, simply stack the blocks, using concrete adhesive to keep the blocks together. Get much higher than a couple feet though, and you’ll need to use mortar or pins to keep the blocks together. Of the two, pinning is easier and cleaner – just make sure your blocks have pre-cast holes.
Like a brick wall, you’ll need to stagger the blocks for stability. Use a chisel and hammer, a cut-off saw with masonry blade, or a wet saw to cut the blocks in half, staggering every other course.
Backfill with aggregate as you add each course of block. Placing a piece of plywood behind the blocks will reduce stress on individual blocks; simply remove the plywood when you’re done filling and compacting.
#4 Work with the Landscape
Just as the proverbial twig can turn the tide, it’s best to stop water and erosion problems at their source. Simple landscaping tricks like raised flowerbeds or berms upstream of your retaining wall will reduce floods and mudslides before they become a problem. And while flowers and shrubs can increase soil stability, avoid planting large trees close to the wall; the last thing you want is a big root poking out of the middle of your retaining wall.
Kurt Anderson has built several retaining walls in clay soil in the frosty Midwest. He’s confident none of them will fall down before his boys are big enough to rebuild them.
 © R. Marmion


